Summary Convert selected features to a shapefile
Instructions provided describe how to convert the selected features of a layer to a new shapefile in ArcGis(ArcMap) by using the Export Data feature.
Two Steps:
- Selecting Features
- Exporting Features
Procedure
-
Select features by manually clicking on them
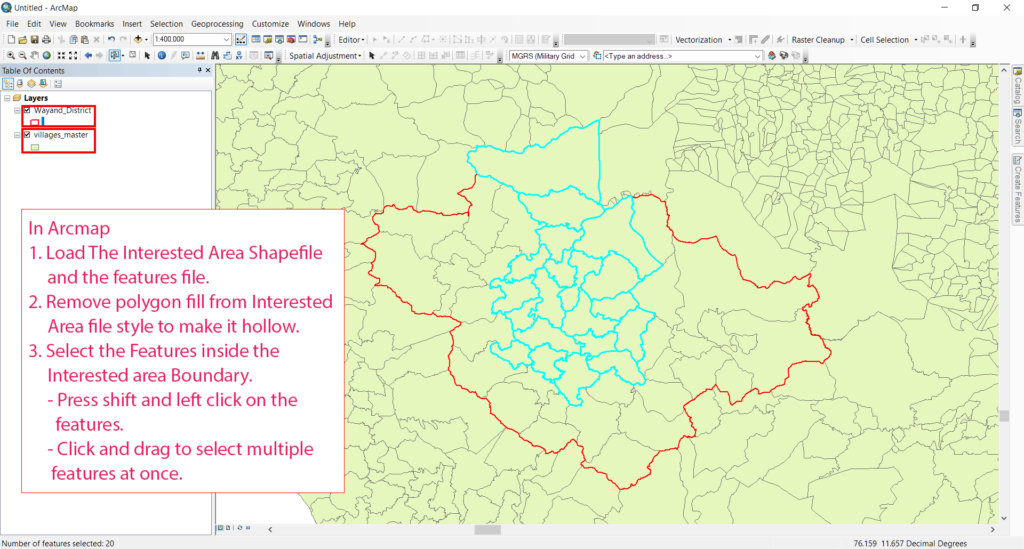
- Remove polygon fill from Interested Area file style to make it hollow (if you load Interested Area Shapefile).
- Select the Features inside the Interested area Boundary or the required features.
- Press shift and left click on the features.
- Click and drag to select multiple features at once.
- Now you are ready to export them follow step 2
- If you want to select features inside Interested Area Shapefile using Select by location follow this tutorial.
- If you want to select features automatically using select by attribute or data column follow this tutorial.
- Load The Interested Area Shapefile (If you have any) and the features file (Source layer or Original Layer).
-
Export features

- Right Click on the Layer which contains the features which you have selected.
- from Data option click on Export data.
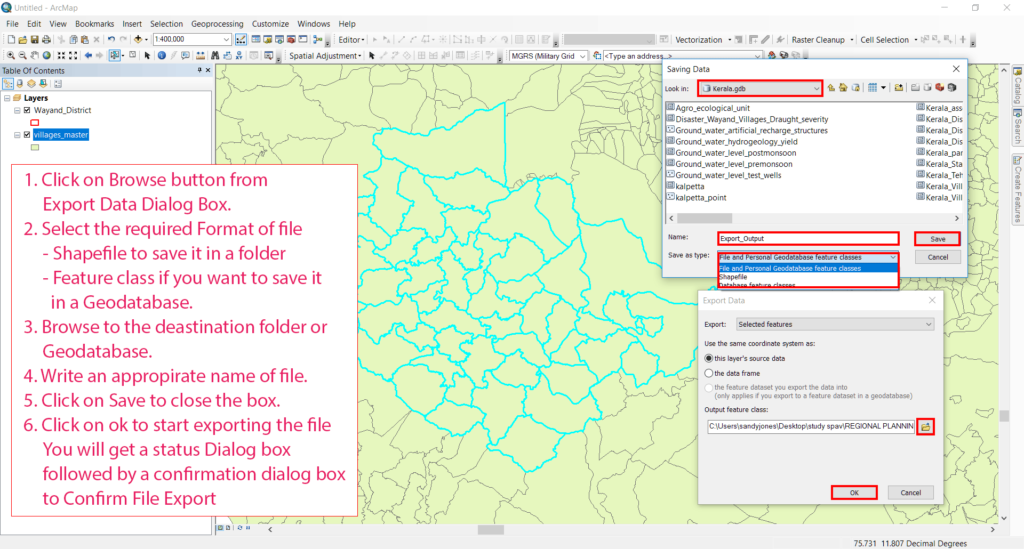
- Click on Browse button from Click on Browse button from Export Data Dialog Box.
- Select the required Format of file – Shapefile to save it in a folder – Feature class if you want to save it in a Geodatabase.
- Browse to the deastination folder or Geodatabase.
- Write an appropirate name of file.
- Click on Save to close the box.
- Click on ok to start exporting the file.
You will get a status Dialog box followed by a confirmation dialog box to Confirm File Export Tadda!