Summary – Plotting Origin Destination Matrix In Gis The Easy Way.
Instructions provided describe how to Plot Origin Destination matrix in Gis in an easy way.
Two Steps:
Note : If you are facing any difficulty following this tutorial please download the sample files from the link below
Procedure
Prepare the Data needed for Plotting in GIS
Prepare the Origin Destination Matrix
Prepare the Origin Destination Matrix
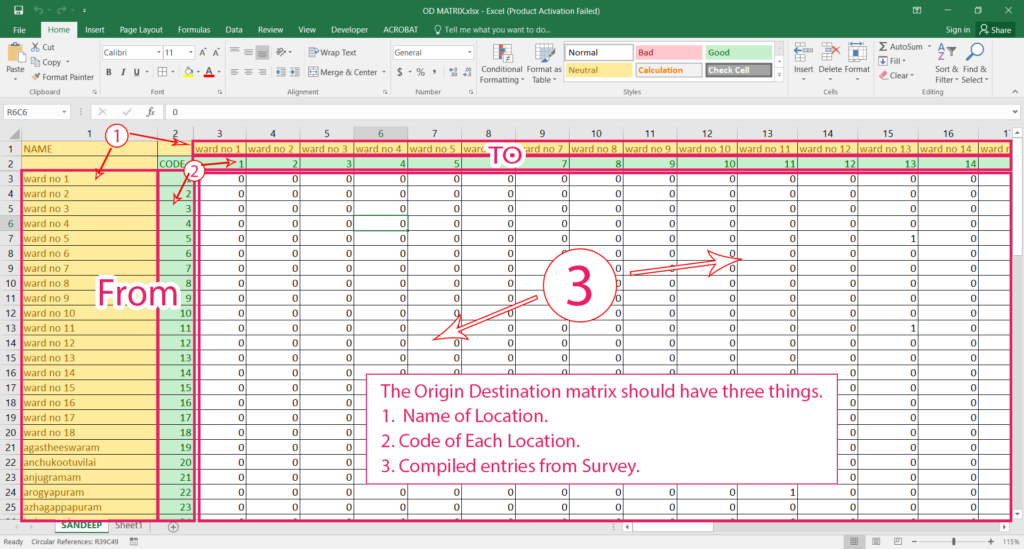
The Origin Destination matrix should have three things.
- Name of Location.
- Code of Each Location.
- Compiled entries from Survey.
Prepare the Lat Long file for each location
Prepare the Lat Long file for each location
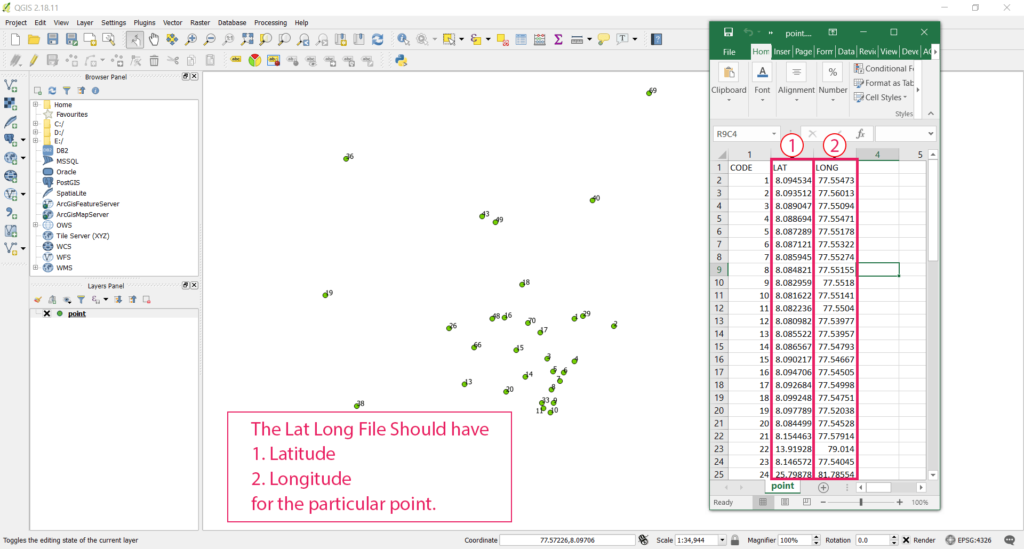
The Lat Long File Should have
- Latitude
- Longitude
for the particular point.
Prepare the Label file for each location
Prepare the Label file for each location
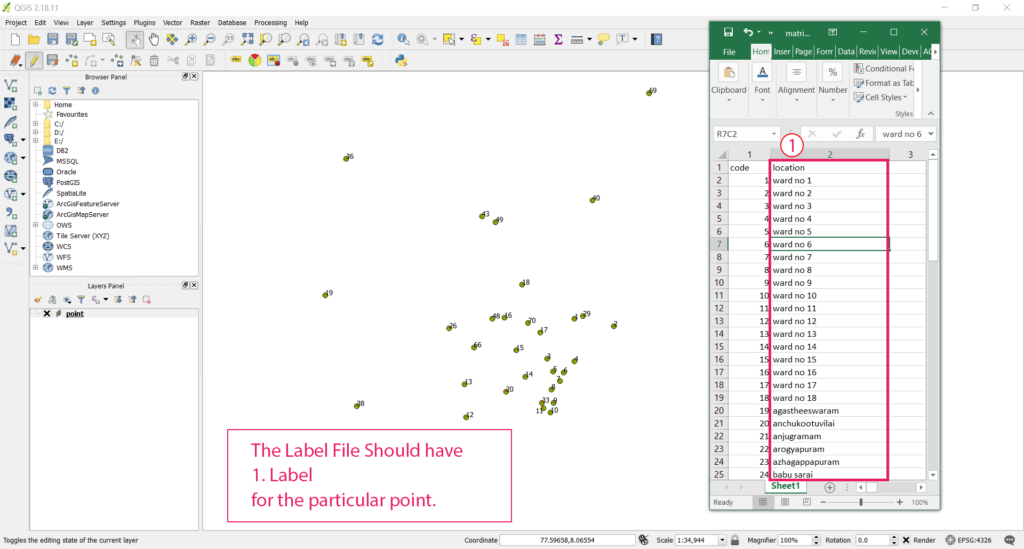
The Label File Should have
- Label
for the particular point.
Note : If you are facing any difficulty following this tutorial please download the sample files from the link below
Import data into QGIS
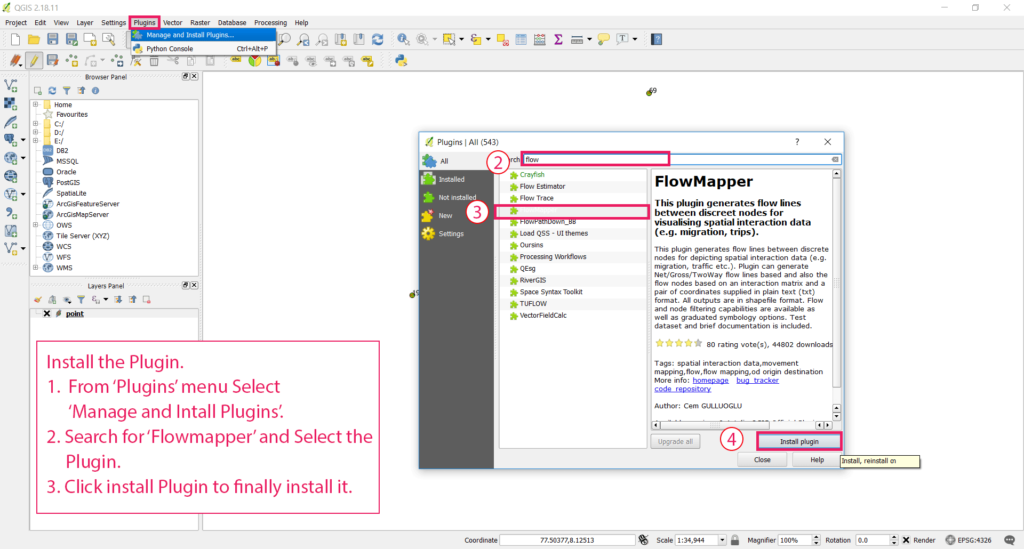
Install flowmapper plugin if you have not installed it till now
Install flowmapper plugin if you have not installed it till now
- From ‘Plugins’ menu Select ‘Manage and Intall Plugins’.
- Search for ‘Flowmapper’ and Select the Plugin.
- Click install Plugin to finally install it.
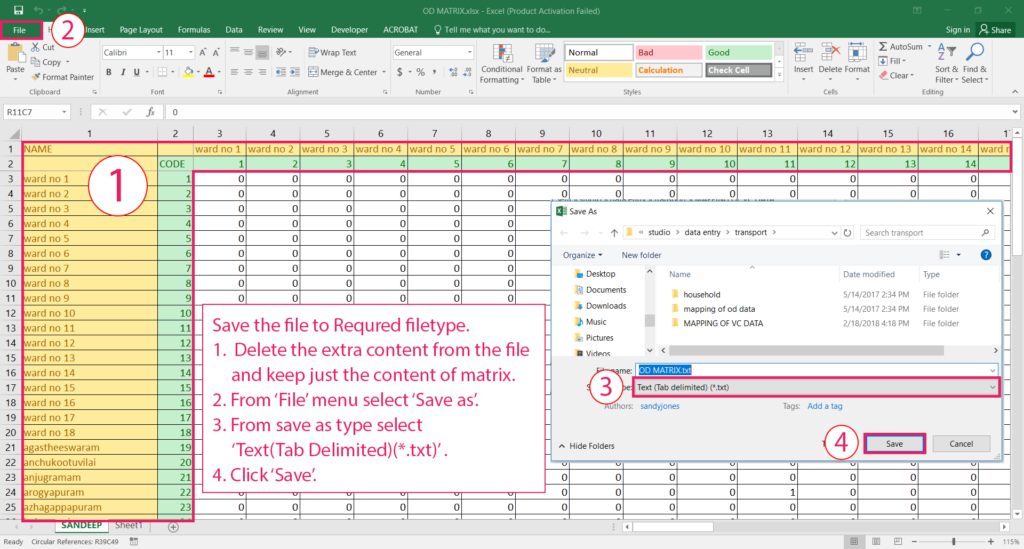
Convert data to Required Format
Convert data to Required Format
- Save the file to Requred filetype.
- Delete the extra content from the file and keep just the content of matrix.
- From ‘File’ menu select ‘Save as’.
- From save as type select ‘Text(Tab Delimited)(*.txt)’.
- Click ‘Save’.
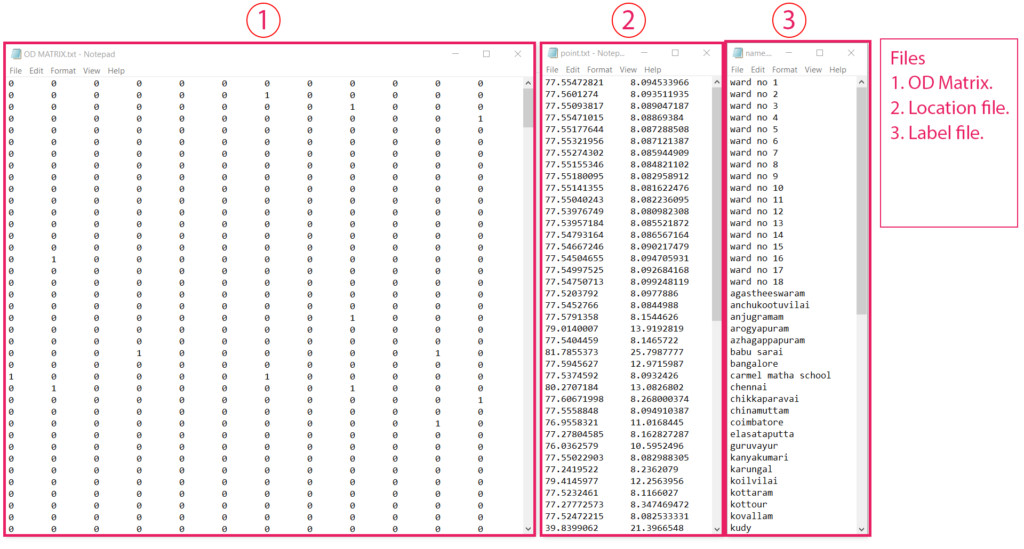
These are Required filetype for QGIS Flowmapper
These are Required filetype for QGIS Flowmapper
Files:-
- OD Matrix.
- Location file.
- Label file.
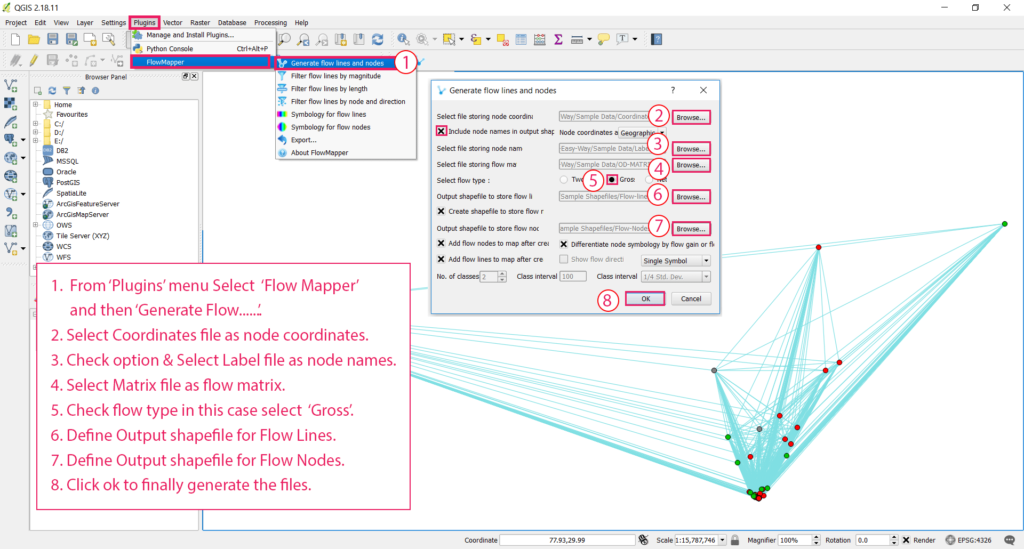
Finally Import data in Qgis
Finally Import data in Qgis
- From ‘Plugins’ menu Select ‘Flow Mapper’ and then ‘Generate Flow……’.
- Select Coordinates file as node coordinates.
- Check option & Select Label file as node names.
- Select Matrix file as flow matrix.
- Check flow type in this case select ‘Gross’.
- Define Output shapefile for Flow Lines.
- Define Output shapefile for Flow Nodes.
- Click ok to finally generate the files.
Tadda done!!
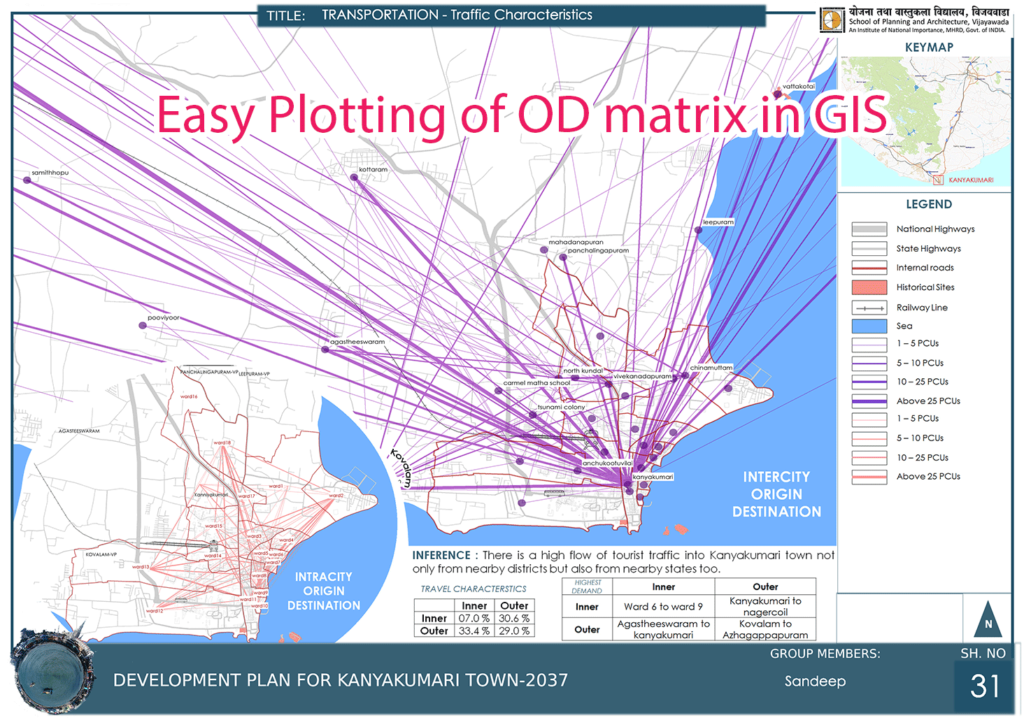
Styled Version of Origin Destination matrix plotted by Qgis Flow Mapper.
Note : If you are facing any difficulty following this tutorial please download the sample files from the link below