Summary – Create a Geodatabase in ArcGis and import files in it
Instructions provided describe how to Create a Geodatabase in ArcGis and import files in it
Procedure
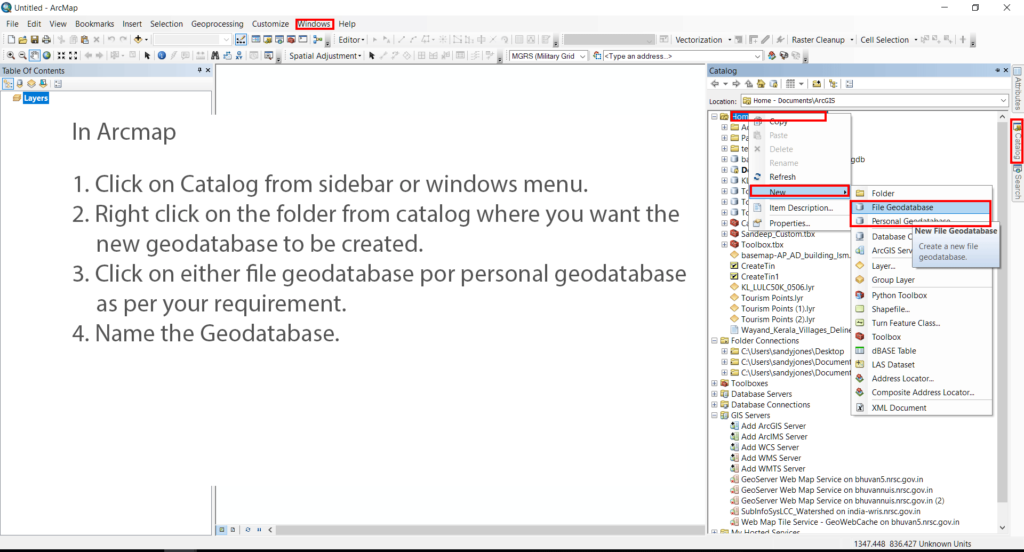
Create a new geo-database
- Click on Catalog from sidebar or windows menu.
- Right click on the folder from catalog where you want the new geo-database to be created.
- Click on either file geodatabase or personal geodatabase as per your requirement.
- Name the Geodatabase.
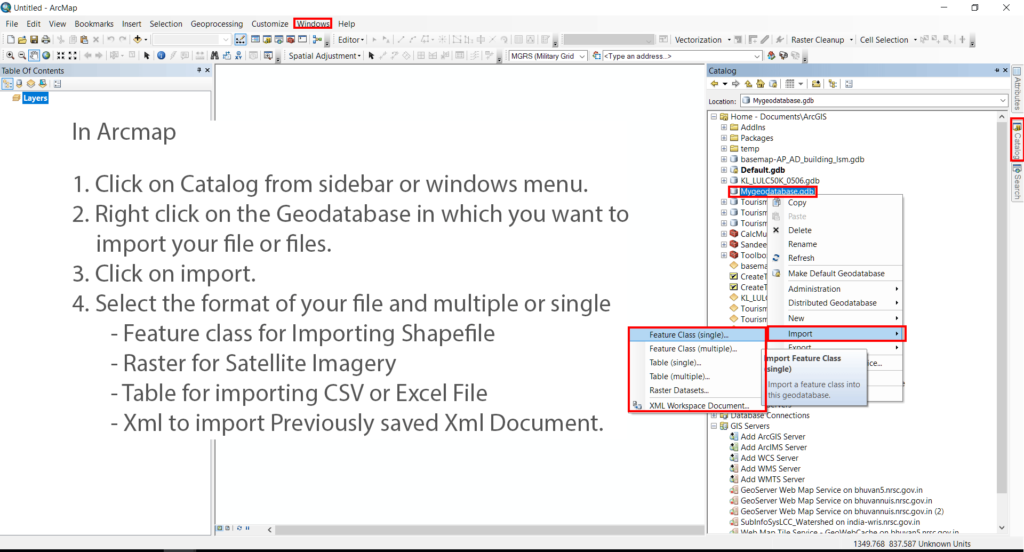
Open the import file Dialog Box
- Click on Catalog from sidebar or windows menu.
- Right click on the Geo-database in which you want to import your file or files.
- Click on import.
- Select the format of your file and multiple or single
- Feature class for Importing Shapefile
- Raster for Satellite Imagery
- Table for importing CSV or Excel File
- Xml to import Previously saved Xml Document.
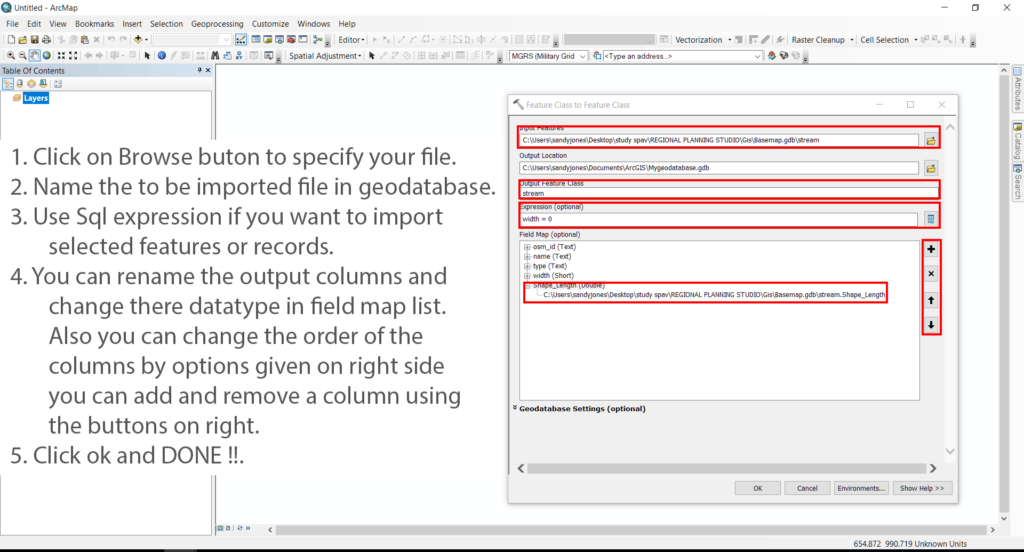
Select the file to import in geo-database and import it
- Click on Browse buton to specify your input file.
- Name the to be imported file in geo-database.
- Use Sql expression if you want to import selected features or records.
- You can rename the output columns and change there datatype in field map list. Also you can change the order of the columns by options given on right side you can add and remove a column using the buttons on right.
- Click ok and DONE !!.
Tadda done!