Summary – Update GIS Features using AutocadMap.
Instructions provided describe how to update GIS features using AutocadMap , in the tutorial AutocadMap 3D has been used to update a Shapefile. We all miss the good cad interface when dealing with GIS data whether it be tracing or other tasks, this tutorial tries to put a how-to for that requirement in a very simple manner.
Three Steps:
Procedure
Connect the GIS dataset to AutocadMap
Connect the GIS dataset to AutocadMap
Connect the GIS dataset to AutocadMap
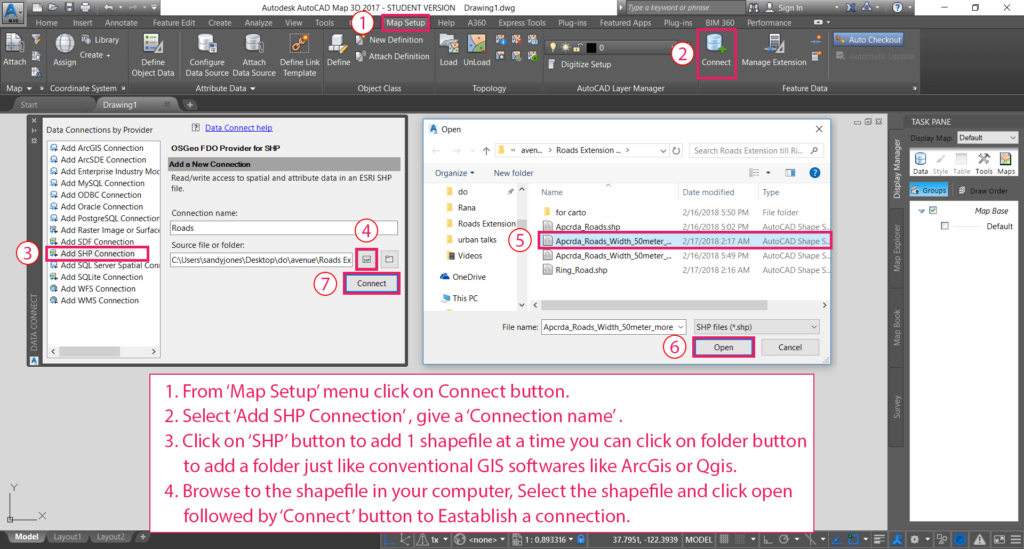
- From ‘Map Setup’ menu click on Connect button.
- Select ‘Add SHP Connection’ , give a ‘Connection name’.
- Click on ‘SHP’ button to add 1 shapefile at a time you can click on folder button to add a folder just like conventional GIS softwares like ArcGis or Qgis.
- Browse to the shapefile in your computer, Select the shapefile and click open followed by ‘Connect’ button to Establish a connection.

Add GIS data to AutocadMap
Add GIS data to AutocadMap
- Select the added Conection under ‘Add SHP Connection’.
- Check the Layers you want to add and click ‘Add to Map’, if it is a shapefile connection only one layer would be there but in case of a folder there would be all shapefiles in the folder.
- You can see the layer added to map and the layer pane on Right side.
Edit GIS Features
Create New Feature or update Existing Shapes
Create New Feature or update Existing Shapes
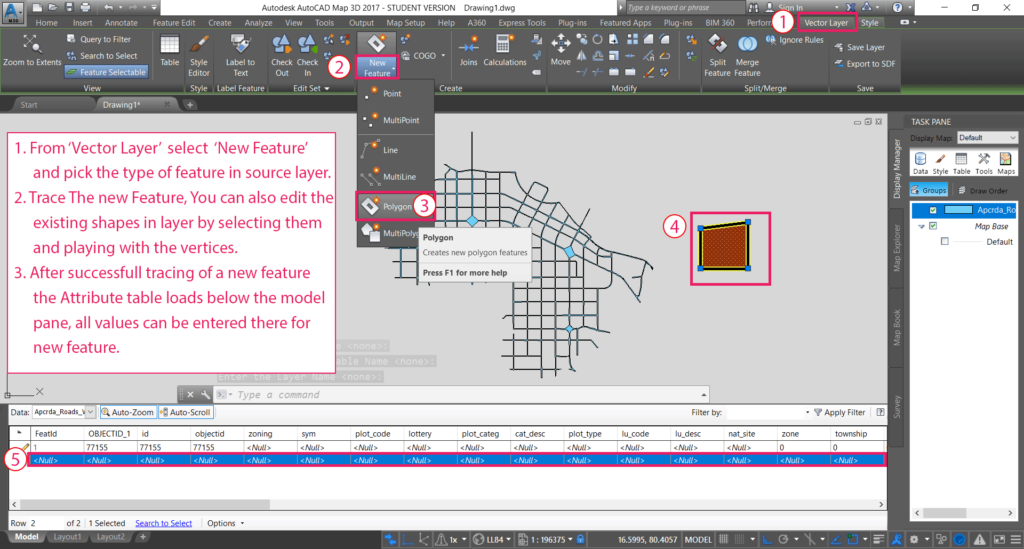
- From ‘Vector Layer’ select ‘New Feature’ and pick the type of feature in source layer.
- Trace The new Feature, You can also edit the existing shapes in layer by selecting them and playing with the vertices.
- After successful tracing of a new feature the Attribute table loads below the model pane, all values can be entered there for new feature.
Save changes to the GIS Source files

Create New Feature or update Existing Shapes copy
Create New Feature or update Existing Shapes copy
- From ‘Vector Layer’ select ‘Check In’ button all changes would be saved to the connected GIS dataset.
Note: You can also use MAPCHECKINALL command as a time saving tool to save data quickly, but beware it would also commit changes in other connected GIS datasets.
Tadda done!!
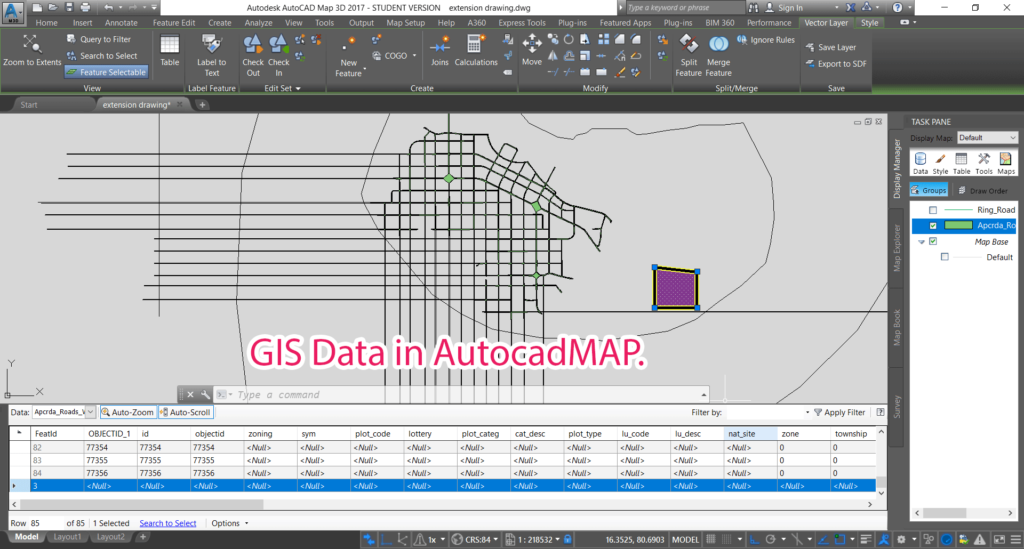
GIS Data in AutocadMAP
if you like the tutorial please spread the word and comment below if you have any questions.